

DC Combiner Box: Which One Is Good? A Practical Guide
2026-09-05
Most DC combiner box advice online reads like a datasheet with extra steps. This guide is different. We're going to walk through the decisions that actually bite you in the field: when a plastic enclosure warps, when a busbar rating is just close enough to fail, and why some boxes survive hail while others don't. By the end, you'll know exactly what separates a good combiner box from a liability—and where Chang Song fits into that picture.
What Actually Matters When Comparing DC Combiner Boxes
A shiny enclosure and a familiar brand name won't tell you much about how a DC combiner box will perform after five years on a hot roof. What actually separates the reliable units from the ones that cause nuisance trips and burned terminals is the current path itself. Look at the busbar material and cross-section: tinned copper holds up far better than bare aluminum in humid or coastal environments, and a thicker bar runs cooler at the same rated current. Also check whether the connections have torque marks or witness marks—if the factory didn't verify the tightening, you'll be chasing loose lugs after the first thermal cycle.
The protection devices deserve more attention than any spec sheet bullet point. A DC arc doesn't behave like an AC fault, so the fuses or breakers need a genuine DC voltage rating that matches your string voltage, not just a generic 1000V stamp. Pay attention to how the fuse holders are arranged: if they're packed too tightly, heat from adjacent circuits will derate the fuses and cause premature opening. And don't assume a surge protective device is useful just because it's present—check the discharge current rating and whether it has a visible status indicator, otherwise you won't know when it's sacrificed itself after a nearby lightning strike.
Field wiring and maintenance access often get overlooked until the first service call. If the cable glands don't match the actual outer diameter of your PV wire, you'll end up with water ingress or stripped threads. Inside, there should be enough room to get a torque wrench on the terminals without removing adjacent components. Clear labeling for each input and a simple polarity layout reduce the chance of a reverse connection on a Friday afternoon. These small ergonomic details are what determine whether a combiner box is a joy to work with or a source of constant frustration.
The Overlooked Specs That Cause Most Field Failures
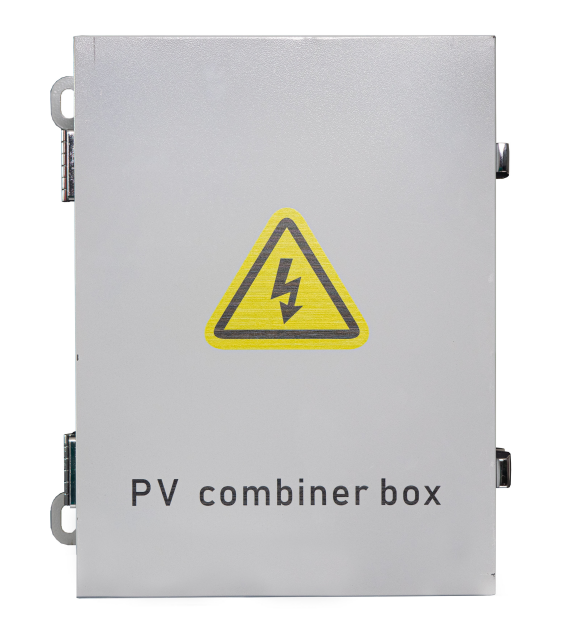
Every engineer pores over datasheets for speed, power, and tolerance, but the real carnage often hides in the margins: derating curves under transient loads, solder joint fatigue life across thermal cycling, and the tiny print on moisture sensitivity levels. A part that benches perfectly on a lab bench can go rogue in the field when the board flexes just enough to crack a ceramic cap, or when a connector's plating wears through after a few hundred mate cycles no one bothered to simulate. These aren't the headline parameters, but they quietly decide whether a product survives a year of vibration, humidity, or simply being dropped once too often.
Look at electrolytic capacitors, for instance. The nominal capacitance and voltage rating tell you nothing about how the ESR drifts after thousands of hours at elevated temperature, or how the electrolyte dries out faster when the device sits near a hot regulator. Field returns pile up because a designer picked a cap rated for 105°C but ignored the ripple current multiplier at 10 kHz, assuming the headline number was enough. The same goes for connectors: contact resistance might look fine on day one, but if the normal force drops due to thermal relaxation of the plastic housing, intermittent failures start showing up in environments with wide temperature swings. These failures rarely reproduce on a bench because the test never replicates the accumulated stress of real-world use.
What separates robust designs from warranty nightmares is the habit of reading between the lines of a datasheet: checking solder mask slivers that invite tin whiskers, verifying that a crystal's load capacitance spec accounts for stray PCB capacitance, or confirming that a MOSFET's safe operating area actually covers the inrush current a motor will draw when cold. The most expensive field failures I've seen didn't come from a bold architectural mistake—they came from assuming that a part's basic advertised specs were sufficient for the messy, non-ideal conditions that wait outside the lab.
String Sizing and Voltage Drop: Getting the Numbers Right
String sizing rarely fails at the nominal numbers; it fails at the temperature extremes. A module's open-circuit voltage climbs as cell temperature drops, and the correction can be substantial. Take a typical 72-cell panel with a 49.2 V Voc at 25°C and a -0.28%/°C temperature coefficient. At an ambient low of -20°C, the cell temperature might reach -15°C or colder, pushing the adjusted Voc close to 55.4 V. If the inverter's maximum input is 1,000 V, that puts the hard cap at 18 modules in series (997 V). Nineteen would exceed the limit before any safety margin. On the other end, the MPPT minimum voltage must be checked at the hottest expected cell temperature, where Vmp sags. A panel with a 41.7 V Vmp at STC can drop to around 36.5 V when the cells run at 70°C. If the inverter needs at least 200 V to operate, six modules is the theoretical minimum, but cloud edge and low-light operation often push that up to seven or eight for real-world stability.
Voltage drop gets miscomputed more often by using the wrong current than the wrong length. The calculation itself is simple: double the one-way cable run, multiply by the operating current and conductor resistance, then compare that to the system voltage. For a 400 V string running at 10 A through an 80 m one-way run of 4 mm² copper (about 0.00461 Ω/m), the round-trip drop is 160 × 10 × 0.00461 = 7.38 V, or 1.84%. That may look acceptable, but it ignores connector and termination resistance, which can add another 0.2-0.5 V per mated pair depending on age and installation quality. A better approach is to use the actual maximum power current at high irradiance and warm cell temperature, not the short-circuit current and not the STC Imp alone, because both can mislead in opposite directions. If the drop creeps above about 1.5% on the DC side, the energy loss over 25 years becomes a quiet but real line item.
The two calculations should not be run in isolation. If you shorten the string to fit a voltage window, you lower the array voltage and raise the current for the same power, which increases voltage drop for the same cable. If you compensate by jumping from 4 mm² to 6 mm², the resistance per meter drops from 0.00461 to about 0.00308 Ω/m, shrinking that earlier drop to 1.23%. But this adds copper cost and weight, and in long conduit runs it can change thermal derating. The smart order is to fix the string length first, aim for the upper end of the MPPT range at normal operating cell temperature, and then treat voltage drop as a cost-benefit decision rather than a code-minimum afterthought. That way the final numbers are not just compliant but actually matched to how the array will run most days.
Enclosure Ratings and Weatherproofing for Real-World Installations
Out in the field, the difference between a clean-running system and a corroded mess often comes down to one thing: how well the enclosure kept the outside out. An IP67 rating sounds great on a datasheet, but real-world installs throw in variables no test lab fully replicates. Dust that works its way into every seam, driving rain hitting from an angle, UV baking the gasket until it cracks, and temperature swings that cause the housing to breathe and pull moisture inside. The trick is matching the rating not just to the worst-case weather, but to the actual microclimate around the mounting spot—under an eave, near a coast, beside a dusty access road.
Many installers over-spec for peace of mind, but that can backfire. A fully sealed IP68 box can trap condensation if there's no pressure equalization or drain, leading to internal fogging and electronics failure even without a single leak. Smart teams look at how the enclosure handles humidity cycling, not just rain. Gaskets need to stay pliable in cold mornings, and cable entries are the usual weak point—no rating survives a poorly sealed conduit. I've seen more failures from a forgotten breather vent than from actual water intrusion.
Weatherproofing isn't static either. A NEMA 4X enclosure next to a saltwater coast will still need routine inspection; the stainless steel screws and hinges are the first to go, even if the box itself is fine. Re-applying anti-seize, replacing aging gaskets, and checking that the door still closes square after a season of thermal flex—that's the real-world side of keeping the rating honest. The label on the door is a starting point, not a guarantee.
Fuse vs. Breaker Protection: A Practical Trade-Off
The choice between a fuse and a breaker often comes down to what you're protecting and how often you expect a fault. Fuses are simple, cheap, and extremely fast, but they're one-shot devices—once blown, you need a replacement on hand. Breakers can be reset in seconds, which is convenient, but they cost more upfront and take up more panel space.
Response time and interrupting capacity also shape the decision. A fuse typically clears a short circuit in a fraction of a cycle, limiting the let-through energy that reaches downstream equipment. Breakers, especially thermal-magnetic designs, are slower to open; electronic trip units can narrow that gap, but they add cost and complexity. In sensitive electronics or high fault current locations, the speed difference alone can tip the balance.
Maintenance habits matter just as much. Replacing a blown fuse forces someone to open the panel and physically swap the element, which invites mistakes like using an oversized fuse. A tripped breaker simply gets flipped back, but repeated resets can hide a persistent overload. The real trade-off is operational philosophy: accept the downtime and simplicity of fuses, or pay more upfront for the resettable convenience of breakers—knowing the protection curve may not be quite as tight.
Why Cheap Combiner Boxes End Up Costing More
The first box I ever bought for a site looked like a bargain—half the price, same spec sheet. Six months later, water had crawled inside through a seal that never quite sat right, and two fuses had overheated because the busbar was thinner than the drawing suggested. The replacement wasn't just the cost of a new enclosure. It was a full day to disconnect every string, trace the fault, argue with the supplier, and rebuild the array while the sun was doing its best work. Cheap boxes don't fail on paper; they fail in the middle of a job.
What gets overlooked is how these units age under real load. Plastic that warps after a season of heat, knockouts that rust within a year, terminal screws that strip on the second tightening—each small failure becomes a maintenance call, a truck roll, a ladder climb. Then there's the mismatch between the label and the actual wire capacity. You think you're saving forty dollars on the box, but you end up buying heavier lugs, redoing terminations, and sometimes replacing a whole run because the space inside simply wasn't designed for the conductors the project requires.
Over a decade of installs, the pattern is consistent: the boxes that last are the ones where the hinges feel solid, the latch clicks without flex, and the gland plate actually aligns with the entry holes. That kind of build never comes from the lowest bid. When you add up the callbacks, the lost production time, and the quiet erosion of your reputation with every failed inspection, the cheap combiner box becomes the most expensive component on the roof.
FAQ
Start with the maximum system voltage. If your string voltage can hit 600V or 1000V under cold conditions, the box must be rated above that, not just at nominal. Then scan the number of inputs and busbar current capacity. Many boxes fail early because the busbar is undersized for parallel strings even though the enclosure looks sturdy.
Yes. Even under panels, humidity, dust and occasional driving rain reach the box. Look for at least NEMA 4 or IP65. For coastal or agricultural sites, go with NEMA 4X or a powder-coated aluminum body. Plastic enclosures can warp in direct sun after a few seasons, which breaks the seal.
Fuses handle high interrupting capacity and are cheaper per string, but they need spares and a disconnect upstream. Breakers allow resetting and can serve as a local disconnect, which speeds up maintenance. For systems under 30 kW, a breaker per string with a main breaker is often more practical than a fuse holder block, unless the utility requires fuses.
Count your current strings, then add at least two spare inputs. System expansions and string reconfigurations happen more often than planned. A four-input box may work today, but a six-input model with blank knockouts costs only slightly more and avoids replacing the whole box later.
Only if you accept a real risk. A nearby lightning strike or utility switching surge can travel into the array wiring and destroy the inverter. In areas with frequent thunderstorms or long exposed cable runs, choose a box with Type 2 DC surge protective devices built in. If you skip it now, at least make sure the DIN rail has room to add SPDs later.
For residential or small commercial systems, string-level current monitoring is a nice-to-have, not a must. A simple fused box with a disconnect is enough if you have module-level monitoring or a central inverter with per-MPPT diagnostics. But on larger commercial rooftops with many parallel strings, a box that supports current sensors per input saves hours of troubleshooting when one string underperforms.
Sometimes. The premium often pays for better busbar plating, pre-punched conduit entries with proper gaskets, and a layout that doesn't force you to bend cables sharply. Cheap boxes may use thin steel that rusts at the knockouts. If you touch the box only once every few years, a mid-range product from a known electrical supplier is fine. Avoid no-name imports where the touch-safe covers crack.
Using a box too small for the conductor bending radius. Thick PV wire forced into a tight enclosure stresses terminals, causing hot spots. Another mistake is mixing string polarities into a cramped busbar area without clear labeling, which leads to reverse polarity faults. Always leave at least 20 percent free space inside after all cables land.
Conclusion
When comparing DC combiner boxes, the specs that dominate datasheets rarely line up with what keeps a system running. You can get caught up in enclosure size or brand name, but the real deciding factors are how well the unit handles heat under continuous load, whether the busbar layout leaves room for torque checks, and how clearly the internal wiring separates positive and negative paths. Many field failures trace back to overlooked details like under-rated terminals, missing strain relief, or insufficient creepage distance in humid environments. Before settling on a model, do the math on string sizing: account for the temperature-corrected open-circuit voltage, not just the nameplate figure, and calculate voltage drop across every connection. A 0.2% difference in contact resistance might seem trivial, but across a long feeder run it becomes heat and lost production. Good boxes make those numbers transparent; bad ones hide them behind vague ratings.
Enclosure ratings only tell part of the weatherproofing story. An IP65 box can still pool condensation if it lacks a breather drain or if the gasket compresses unevenly around conduit entries. The same goes for protection choices: fuses give precise interrupting ratings and are easy to replace, but breakers offer reset convenience at the cost of adding more moving parts and potential nuisance tripping in hot attics. Cheap combiner boxes typically cut corners on plated copper, UV-stabilized plastics, and proper torque labels. That leads to loose connections, corrosion, and arc faults months after installation. Spending less up front often means a service call in year two, plus the labor to re-pull cables and re-terminate strings. The box that costs more initially is usually the one you forget is there.
Contact Us
Contact Person: Tonglun Chen
Email: [email protected]
Tel/WhatsApp: 8618906642555
Website: https://www.cncsele.com