
How to Replace Car Door Rubber Bellows: A Step-by-Step Guide
2024-08-29
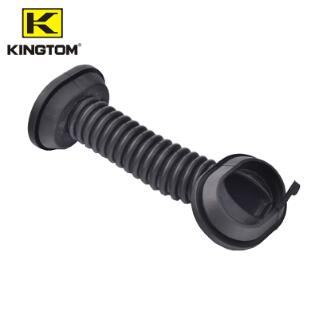
Replacing car door rubber bellows might seem like a daunting task, but with the right tools and a bit of patience, it can be a manageable DIY project. In this blog, we'll guide you through the process of replacing worn or damaged car door rubber bellows, helping you maintain the integrity of your vehicle's electrical system and door functionality.
Tools You'll Need
- Replacement car door rubber bellows
- Screwdriver set
- Pliers
- Trim removal tool (optional but helpful)
- Lubricant spray (silicone-based)
- Electrical tape (if needed)
Step 1: Preparation
Before you begin, ensure that your vehicle is parked on a flat surface and that the ignition is turned off. Gather all the necessary tools and make sure you have the correct replacement bellows for your vehicle model. If you’re unsure, consult your vehicle’s manual or a local auto parts store.
Step 2: Remove the Door Panel (if necessary)
In some cases, you may need to remove the interior door panel to access the rubber bellows. This step varies depending on the make and model of your vehicle. Generally, you’ll need to:
1. Use a trim removal tool or a flathead screwdriver to carefully pry off the door panel.
2. Disconnect any electrical connectors (such as for power windows or door locks).
3. Set the door panel aside in a safe place.
Step 3: Access the Rubber Bellows
With the door panel removed, you should have clear access to the car door rubber bellows. The bellows are typically held in place by clips, screws, or simply pressed into the openings between the door and the vehicle body.
Step 4: Remove the Old Bellows
Carefully disconnect any clips or screws holding the bellows in place. If the bellows are press-fitted, gently pull them out of their slots. Take care not to damage the wires or cables inside the bellows during removal.
Step 5: Install the New Bellows
1. Lubricate the New Bellows: Apply a small amount of silicone-based lubricant to the new bellows to make installation easier and to ensure a good seal.
2. Fit the Bellows: Align the new bellows with the openings in the door and the vehicle body. Gently press them into place, ensuring that they are seated securely and that the wires and cables are properly routed inside.
3. Secure the Bellows: If the bellows require clips or screws, reattach them now. Make sure the bellows are secure and that there are no gaps where dirt or moisture could enter.
Step 6: Reassemble the Door Panel
If you removed the door panel, now is the time to reattach it. Connect any electrical connectors you previously disconnected and carefully press the panel back into place. Make sure all clips and screws are resecured.
Step 7: Test the Door and Electrical Functions
Once everything is reassembled, test the door by opening and closing it several times. Check that the bellows move smoothly and that the door functions, such as power windows and locks, are working correctly. If everything is in order, your replacement job is complete!
Conclusion
Replacing car door rubber bellows is a task that requires some attention to detail, but it’s well within the reach of most DIY enthusiasts. By following these steps, you can ensure that your vehicle’s electrical components are protected, and your car doors function smoothly for years to come. Regular maintenance and timely replacement of these small yet crucial parts can save you from more significant issues in the future.