
Step-by-Step Guide to Installing an Amplifier Using an Installation Kit
2024-07-18
Introduction
Installing an amplifier can seem daunting, but with the right tools and a step-by-step guide, it becomes manageable. This blog will walk you through the process of installing an amplifier using an installation kit.
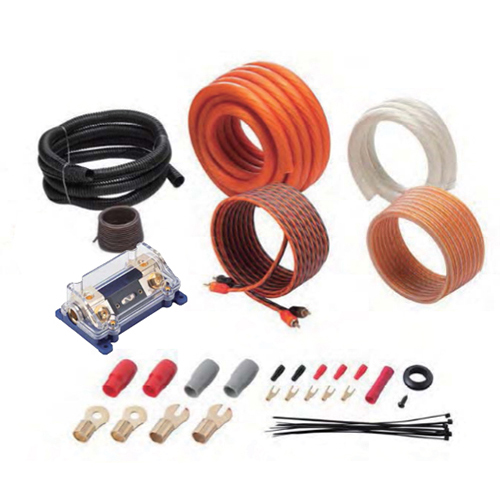
Tools and Materials Needed
- Wire strippers
- Crimping tool
- Screwdrivers
- Electrical tape
- Multimeter (optional)
Step-by-Step Installation Guide:
Step 1: Disconnect the Battery
Always start by disconnecting the negative terminal of your car battery to avoid any electrical accidents.
Step 2: Run the Power Wire
1. Route the Power Wire: Run the power wire from the battery to the amplifier location. Use a grommet to pass the wire through the firewall safely.
2. Connect to the Battery: Attach the power wire to the positive terminal of the battery using the fuse holder.
Step 3: Ground the Amplifier
1. Find a Ground Point: Choose a clean, unpainted metal surface near the amplifier.
2. Attach the Ground Wire: Secure the ground wire from the kit to the ground point using a ring terminal.
Step 4: Run the RCA Cables and Remote Turn-On Wire
1. Connect RCA Cables: Run the RCA cables from the head unit to the amplifier, keeping them away from power wires to reduce interference.
2. Install Remote Turn-On Wire: Connect the remote turn-on wire from the head unit to the amplifier.
Step 5: Connect the Speaker Wires
1. Run Speaker Wires: Connect the speaker wires from the amplifier to your speakers, ensuring proper polarity.
2. Secure Connections: Use crimping tools and electrical tape to secure all connections.
Step 6: Reconnect the Battery and Test
1. Reconnect the Battery: Reattach the negative terminal of the car battery.
2. Test the System: Turn on the head unit and check if the amplifier powers up and produces sound.
Conclusion
By following these steps, you can successfully install an amplifier in your car, enhancing your audio system’s performance. Ensure you double-check all connections and use quality materials from your installation kit for the best results.